Debian安装Samba

这东西简单,几行命令就可以完事

apt install samba

修改配置

vim /etc/samba/smb.conf

# 让 win10 可以直接访问:
# 修改内容:
#   map to guest = bad user
   map to guest = never

# 在文件最后新增共享的目录, 名字随便取
[data_hd] 
  comment = HDD Samba Share File
  browseable = yes
  path = /data_hd
  read only = no
  guest ok = no
  create mask = 0755
  writable = yes

增加samba用户

useradd -G sambashare -M -s /sbin/nologin [用户名] # 增加系统用户, sambashare组是安装smb后就会存在的
smbpasswd -a [用户名] #然后输入密码
chown -R [用户名]:sambashare /data_hd # 让smb用户可以读写

smbpasswd -a 【用户名】 #然后输入密码
pdbedit -w -L #列出现有的Samba用户列表

共享配置完整的参数

共享选项及说明,按照需求合理配置
[共享名称]:共享中看到的共享目录名
comment = 共享的描述. 
path = 共享目录路径(可以用%u、%m这样的宏来代替路径如:/home/share/%u) 
browseable = yes/no指定该共享是否在“网上邻居”中可见。
writable = yes/no指定该共享路径是否可写。
read only = yes/no设置共享目录为只读(注意设置不要与writable有冲突) 
available = yes/no指定该共享资源是否可用。
admin users = bobyuan,jane指定该共享的管理员,用户验证方式为“security=share”时,此项无效。 
valid users = bobyuan,jane允许访问该共享的用户或组-“@+组名” 
invalid users = 禁止访问该共享的用户与组(同上) 
write list = 允许写入该共享的用户
public = yes/no共享是否允许guest账户访问。 
guest ok = yes/no意义同“public”。
create mask = 0700指定用户通过Samba在该共享目录中创建文件的默认权限。0600代表创建文件的权限为rw-------
directory mask = 0700指定用户通过Samba在该共享目录中创建目录的默认权限。0600代表创建目录的权限为rwx------

openwrt

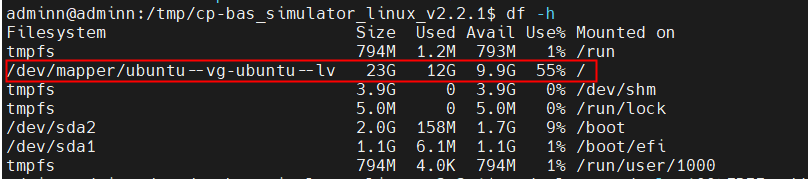
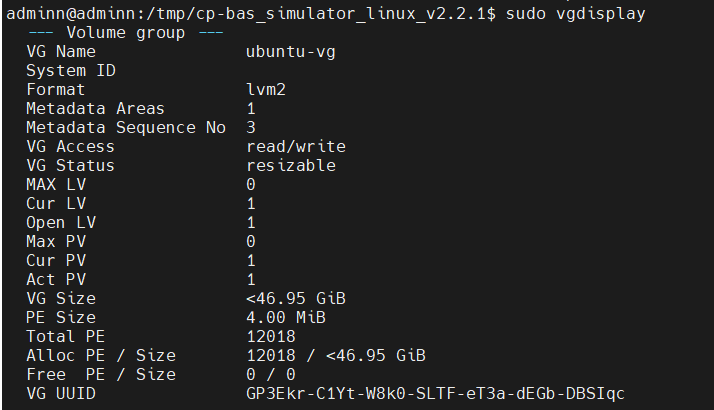
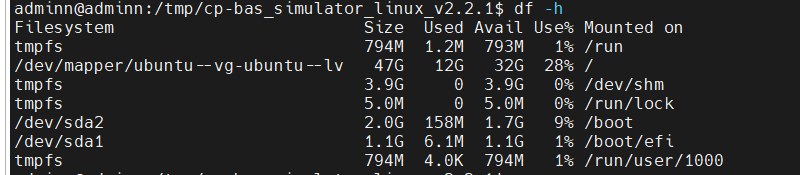
硬盘扩容,用 x86-64-generic-ext4-combined.img 更容易

https://www.yydnas.cn/2023/11/2023.11.09-OpenWrt%E7%A3%81%E7%9B%98%E6%89%A9%E5%AE%B9/index.html

导入镜像

qm importdisk 105 /var/lib/vz/template/iso/immortalwrt-23.05.4-x86-64-generic-ext4-combined.img local-lvm

恢复固件

mount_root
firstboot
reboot -f

网卡修改

vim /etc/config/network

config interface 'lan'
        option device 'br-lan'
        option proto 'static'
        option ipaddr '192.168.50.250'
        option dns '114.114.114.114 119.29.29.29'
        option gateway '192.168.50.1'
        option netmask '255.255.255.0'
        option ip6assign '60'

安装主题

https://github.com/jerrykuku/luci-theme-argon

opkg install luci-compat luci-lib-ipkg
wget --no-check-certificate https://github.com/jerrykuku/luci-theme-argon/releases/download/v2.3.1/luci-theme-argon_2.3.1_all.ipk -o  luci-theme-argon_2.3.1_all.ipk
opkg install luci-theme-argon*.ipk

安装openclash

https://github.com/vernesong/OpenClash

规则覆盖

rules:
  - DOMAIN-KEYWORD,google,自动选择
  - DOMAIN-KEYWORD,facebook,自动选择
  - DOMAIN-KEYWORD,twitter,自动选择
  - DOMAIN,gmail.com,自动选择
  - DOMAIN-SUFFIX,x.com,自动选择
  - DOMAIN-SUFFIX,twimg.com,自动选择
  - DOMAIN-SUFFIX,fbcdn.net,自动选择
  - DOMAIN-SUFFIX,youtube.com,自动选择
  - DOMAIN-SUFFIX,github.com,自动选择
  - DOMAIN-SUFFIX,githubassets.com,自动选择
  - DOMAIN-SUFFIX,githubusercontent.com,自动选择
  - DOMAIN-SUFFIX,ytimg.com,自动选择
  - DOMAIN-SUFFIX,docker.com,自动选择
  - DOMAIN-SUFFIX,phind.com,自动选择
  - DOMAIN-SUFFIX,ipify.org,自动选择
  - DOMAIN-SUFFIX,ggpht.com,自动选择
  - DOMAIN-SUFFIX,cloudflare.com,自动选择
  - DOMAIN-SUFFIX,v2ex.com,自动选择

##- PROCESS-NAME,curl,DIRECT #匹配路由自身进程(curl直连)
##- DOMAIN-SUFFIX,google.com,Proxy #匹配域名后缀(交由Proxy代理服务器组)
##- DOMAIN-KEYWORD,google,Proxy #匹配域名关键字(交由Proxy代理服务器组)
##- DOMAIN,google.com,Proxy #匹配域名(交由Proxy代理服务器组)
##- DOMAIN-SUFFIX,ad.com,REJECT #匹配域名后缀(拒绝)
##- IP-CIDR,127.0.0.0/8,DIRECT #匹配数据目标IP(直连)
##- SRC-IP-CIDR,192.168.1.201/32,DIRECT #匹配数据发起IP(直连)
##- DST-PORT,80,DIRECT #匹配数据目标端口(直连)
##- SRC-PORT,7777,DIRECT #匹配数据源端口(直连)
##- GEOSITE,category-public-tracker,DIRECT #匹配GEOSITE数据库规则(直连)
##- DOMAIN-REGEX,^abc.*com,PROXY #正则匹配域名
##- RULE-SET,providername,PROXY #匹配规则集

##- IP-CIDR6,2620:0:2d0:200::7/32,PROXY
##- IP-SUFFIX,8.8.8.8/24,PROXY
##- IP-ASN,13335,DIRECT

##- SRC-GEOIP,cn,DIRECT
##- SRC-IP-ASN,9808,DIRECT
##- SRC-IP-SUFFIX,192.168.1.201/8,DIRECT

##- IN-PORT,7890,PROXY
##- IN-TYPE,SOCKS/HTTP,PROXY
##- IN-USER,mihomo,PROXY
##- IN-NAME,ss,PROXY

##- PROCESS-NAME-REGEX,curl$,PROXY
##- PROCESS-NAME-REGEX,(?i)Telegram,PROXY
##- PROCESS-NAME-REGEX,.*telegram.*,PROXY

##- NETWORK,udp,DIRECT
##- DSCP,4,DIRECT

##- AND,((DOMAIN,baidu.com),(NETWORK,UDP)),DIRECT
##- OR,((NETWORK,UDP),(DOMAIN,baidu.com)),REJECT
##- NOT,((DOMAIN,baidu.com)),PROXY
##- SUB-RULE,(NETWORK,tcp),sub-rule

##排序在上的规则优先生效,如添加(去除规则前的#号):
##IP段:192.168.1.2-192.168.1.200 直连
##- SRC-IP-CIDR,192.168.1.2/31,DIRECT
##- SRC-IP-CIDR,192.168.1.4/30,DIRECT
##- SRC-IP-CIDR,192.168.1.8/29,DIRECT
##- SRC-IP-CIDR,192.168.1.16/28,DIRECT
##- SRC-IP-CIDR,192.168.1.32/27,DIRECT
##- SRC-IP-CIDR,192.168.1.64/26,DIRECT
##- SRC-IP-CIDR,192.168.1.128/26,DIRECT
##- SRC-IP-CIDR,192.168.1.192/29,DIRECT
##- SRC-IP-CIDR,192.168.1.200/32,DIRECT

##IP段:192.168.1.202-192.168.1.255 直连
##- SRC-IP-CIDR,192.168.1.202/31,DIRECT
##- SRC-IP-CIDR,192.168.1.204/30,DIRECT
##- SRC-IP-CIDR,192.168.1.208/28,DIRECT
##- SRC-IP-CIDR,192.168.1.224/27,DIRECT

##此时IP为192.168.1.1和192.168.1.201的客户端流量走代理(策略),其余客户端不走代理
##因为Fake-IP模式下,IP地址为192.168.1.1的路由器自身流量可走代理(策略),所以需要排除

##仅设置路由器自身直连:
##- SRC-IP-CIDR,192.168.1.1/32,DIRECT
##- SRC-IP-CIDR,198.18.0.1/32,DIRECT

##DDNS
##- DOMAIN-KEYWORD,synology,DIRECT
##- DOMAIN-KEYWORD,quickconnect,DIRECT
##- DOMAIN-SUFFIX,checkip.dyndns.org,DIRECT
##- DOMAIN-SUFFIX,checkipv6.dyndns.org,DIRECT
##- DOMAIN-SUFFIX,checkip.synology.com,DIRECT
##- DOMAIN-SUFFIX,ifconfig.co,DIRECT
##- DOMAIN-SUFFIX,api.myip.com,DIRECT
##- DOMAIN-SUFFIX,ip-api.com,DIRECT
##- DOMAIN-SUFFIX,ipapi.co,DIRECT
##- DOMAIN-SUFFIX,ip6.seeip.org,DIRECT
##- DOMAIN-SUFFIX,members.3322.org,DIRECT

##在线IP段转CIDR地址:http://ip2cidr.com

Ubuntu系统安装系统后硬盘大小不正确解决

Ubuntu server 默认使用LVM进行磁盘管理,安装后只使用了硬盘一部分空间,要充分利用硬盘空间,需要扩展现有的逻辑卷;

如果添加新硬盘,需要将其添加到现有的卷组,然后扩展逻辑卷到新硬盘。

1、查看磁盘占用情况

df -h

2、查看现有的卷组

sudo vgdisplay

3、扩展现有的逻辑卷

sudo lvextend -l +100%FREE /dev/mapper/ubuntu–vg-ubuntu–lv

 4、 重新计算逻辑卷大小

sudo resize2fs /dev/mapper/ubuntu–vg-ubuntu–lv

5、再次查看磁盘使用情况

df -h

至此,整个硬盘空间都可以使用了。

https://www.cnblogs.com/longan-wang/p/18046207

Gitea删除ruuner后,再次启用

从Gitea删除runner,你的runner会记录一个文件 data/.runner 像下面的内容

{
  "WARNING": "This file is automatically generated by act-runner. Do not edit it manually unless you know what you are doing. Removing this file will cause act runner to re-register as a new runner.",
  "id": 1,
  "uuid": "9915f68d-7d47-4731-b329-aa53ff8ba01f",
  "name": "runner1",
  "token": "276147af85ea87c3fce5caeef0c93012e6486e89",
  "address": "http://192.168.50.117:3000",
  "labels": [
    "runner1:host"
  ]
}

这个文件在runner的容器里面,去删除掉,就会重新注册了

Gitea 非标准端口配置代理注意点

这是官方给的例子:

server {
    ...
    location / {
        client_max_body_size 512M;
        proxy_pass http://localhost:3000;
        proxy_set_header Connection $http_connection;
        proxy_set_header Upgrade $http_upgrade;
        proxy_set_header Host $host;
        proxy_set_header X-Real-IP $remote_addr;
        proxy_set_header X-Forwarded-For $proxy_add_x_forwarded_for;
        proxy_set_header X-Forwarded-Proto $scheme;
    }
}

你访问Gitea的域名为非标端口(80,443)时,需要在Host上加上端口

server {
    ...
    location / {
        proxy_set_header Host $host:你的端口;
        ...
    }
}

原因是源码里取访问host时,没有取 X-Forwarded-For,而是取的Header里的Host

源码文件:modules/httplib/url.go 及内容处:

func GuessCurrentHostURL(ctx context.Context) string {
	req, ok := ctx.Value(RequestContextKey).(*http.Request)
	if !ok {
		return strings.TrimSuffix(setting.AppURL, setting.AppSubURL+"/")
	}
	// If no scheme provided by reverse proxy, then do not guess the AppURL, use the configured one.
	// At the moment, if site admin doesn't configure the proxy headers correctly, then Gitea would guess wrong.
	// There are some cases:
	// 1. The reverse proxy is configured correctly, it passes "X-Forwarded-Proto/Host" headers. Perfect, Gitea can handle it correctly.
	// 2. The reverse proxy is not configured correctly, doesn't pass "X-Forwarded-Proto/Host" headers, eg: only one "proxy_pass http://gitea:3000" in Nginx.
	// 3. There is no reverse proxy.
	// Without an extra config option, Gitea is impossible to distinguish between case 2 and case 3,
	// then case 2 would result in wrong guess like guessed AppURL becomes "http://gitea:3000/", which is not accessible by end users.
	// So in the future maybe it should introduce a new config option, to let site admin decide how to guess the AppURL.
	reqScheme := getRequestScheme(req)
	if reqScheme == "" {
		return strings.TrimSuffix(setting.AppURL, setting.AppSubURL+"/")
	}
	// X-Forwarded-Host has many problems: non-standard, not well-defined (X-Forwarded-Port or not), conflicts with Host header.
	// So do not use X-Forwarded-Host, just use Host header directly.
	return reqScheme + "://" + req.Host # 就是这里
}

分析过程就不写了,官方也说了为什么要取这个值,所以注意一下就好

JsonCPP 解析与对象生成

安装JsonCPP

vcpkg install jsoncpp

CMake文件添加

find_package(jsoncpp CONFIG REQUIRED)
target_link_libraries(${PROJECT_NAME} PRIVATE JsonCpp::JsonCpp)

解析Json

#include <iostream>
#include "json/reader.h"
#include "json/value.h"

using namespace std;


int main(int argc, char **argv) {

    std::string strJson = R"({"id":4,"name":"Chad","scores":2.99})";
    Json::Reader reader;
    Json::Value jvRoot;
    if (reader.parse(strJson, jvRoot)) {
        int nID = jvRoot["id"].asInt();
        std::string strName = jvRoot["name"].asString();
        double dScores = 0;
        
        if (jvRoot.isMember("scores")) { // 判断是否存在
            dScores = jvRoot["scores"].asDouble();
        }

        cout << nID << ";" << strName << ";" << dScores << endl;
    }
    return 0;
}


存储Json

#include <iostream>
#include <fstream>
#include "json/writer.h"
#include "json/reader.h"
#include "json/value.h"

using namespace std;

int writeJson() {
    Json::Value root;
    Json::Value data;
    root["code"] = 1001;
    root["message"] = "No permission";
    if (!data.empty()) { // data可以是m_data成员变量
        root["data"] = data;
    }

    // 保存为字符串
    string tmp(root.toStyledString());
    cout << tmp << endl;

    // 写入文件
    std::ofstream ofs("example.json");
    Json::StreamWriterBuilder builder;
    std::unique_ptr<Json::StreamWriter> writer(builder.newStreamWriter());
    if (writer->write(root, &ofs)) {
        cout << "保存成功" << endl;
    } else {
        cout << "保存失败" << endl;
    }
    return 0;
}

CMake设置MSVC工程MT/MTd/MD/MDd

在Windows下用CMake开发可执行程度,都会遇到的问题

cmake_minimum_required(VERSION 3.27)
 
# 设置策略CMP0091为NEW,新策略
if (POLICY CMP0091)
    cmake_policy(SET CMP0091 NEW)
endif (POLICY CMP0091)
 
project(Test)
 
# cxx标准
set(CMAKE_CXX_STANDARD 11)
 
add_executable(
        ${PROJECT_NAME}
        main.cpp
)

# 设置MT/MTd
set_property(TARGET ${PROJECT_NAME} PROPERTY
        MSVC_RUNTIME_LIBRARY "MultiThreaded$<$<CONFIG:Debug>:Debug>")
        
# 链接到user32库
#target_link_libraries(${PROJECT_NAME} user32)